


Wifi routers have become a fixture in nearly every home, quietly delivering high-speed internet to every room. Most people do not realize that these devices are constantly emitting electromagnetic radiation, which radiates in all directions and can expose families to invisible risks even from several yards away. It sounds high-tech and futuristic, but it is not just a problem for techies or scientists. Anyone with a wifi signal at home could be dealing with these health concerns without ever knowing the source.
Table of Contents
- Step 1: Assess Your Current Wifi Router Setup
- Step 2: Gather Necessary Materials For Shielding
- Step 3: Install Shielding Materials Around The Router
- Step 4: Optimize Router Placement For Maximum Effectiveness
- Step 5: Test Wifi Signal Strength And Shielding Effect
- Step 6: Monitor Radiation Levels Over Time
Quick Summary
| Key Point | Explanation |
|---|---|
| 1. Assess router placement for radiation exposure | Evaluate the router’s location relative to living spaces to minimize exposure risk effectively. |
| 2. Gather high-quality EMF shielding materials | Use EMF-blocking fabrics and precise tools for optimal radiation reduction and accurate measurements. |
| 3. Ensure proper installation of shielding | Securely attach shielding materials, allowing ventilation while preventing radiation leakage. |
| 4. Strategically position the router | Place the router away from frequented areas and obstructions to reduce radiation impact and enhance connectivity. |
| 5. Continuously monitor radiation levels | Regularly check and document radiation exposure to adapt shielding measures and maintain health safety. |
Step 1: Assess Your Current Wifi Router Setup
Understanding your current wifi router setup is the critical first stage in implementing effective wifi router shielding techniques. Most people are unaware that their router continuously emits electromagnetic radiation throughout their living spaces, creating an invisible environment of potential health risks.
Begin by physically locating your wifi router and conducting a preliminary assessment of its placement. Routers typically emit radiation in all directions, so consider its current position relative to areas where you and your family spend significant time. Bedrooms, home offices, and living spaces where children play are particularly important to evaluate.
To properly assess your router’s radiation exposure, you’ll need a few basic tools. An EMF meter is the most reliable instrument for measuring radiofrequency radiation. These handheld devices provide precise measurements of electromagnetic field intensity, allowing you to understand the exact radiation levels in different areas of your home. When selecting an EMF meter, look for models that specifically measure radiofrequency radiation in the range of wifi signals (2.4 GHz and 5 GHz).
As you conduct your assessment, pay close attention to proximity factors. Radiation intensity decreases dramatically with distance, so measuring radiation levels at various distances from the router will help you understand potential exposure risks. According to the National Institute of Environmental Health Sciences, identifying and understanding radiation sources is the foundational step in managing electromagnetic field exposure.
Key verification criteria for a successful router assessment include:
- Precise measurement of radiation levels using an EMF meter
- Documentation of router location and surrounding environment
- Identification of high-exposure areas within your living space
Remember, this initial assessment provides the groundwork for developing a comprehensive wifi router shielding strategy. By understanding your current setup, you’ll be equipped to make informed decisions about protecting yourself and your family from potential electromagnetic radiation risks.
Step 2: Gather Necessary Materials for Shielding
The process of wifi router shielding requires strategic preparation and specific materials designed to block and reduce electromagnetic radiation. Your goal in this step is to collect the right tools and protective materials that will create an effective barrier against potentially harmful radiofrequency emissions.
Start by acquiring an EMF-blocking fabric or specialized shielding material. These advanced textiles are engineered with conductive metallic threads that can effectively attenuate electromagnetic radiation. Research from scientific publications confirms that materials like copper mesh and aluminum-infused fabrics provide robust protection against radiofrequency signals.
In addition to shielding fabric, you’ll want to gather some supplementary tools. A high-quality EMF meter is essential for measuring the effectiveness of your shielding efforts. Choose a meter capable of detecting frequencies in the 2.4 GHz and 5 GHz ranges, which are standard for most wifi routers. Consider models that provide both numerical readings and visual indicators of radiation intensity.
Your material collection should also include precision cutting tools like fabric scissors, measuring tape, and potentially adhesive or velcro strips for securing shielding materials. Accuracy is crucial when creating a comprehensive radiation barrier, so invest in tools that allow you to make precise measurements and clean cuts.
Key materials to gather include:
- EMF-blocking fabric or copper mesh
- Precision cutting tools
- EMF meter for measurements
- Adhesive or securing mechanisms
- Measuring tape
Remember that the quality of your materials directly impacts the effectiveness of your wifi router shielding strategy. Cheap or inappropriate materials might provide a false sense of security without delivering meaningful radiation protection. Take time to research and select high-grade shielding components that are specifically designed for electromagnetic field reduction.
By meticulously gathering these materials, you’re setting the stage for a comprehensive approach to minimizing unnecessary electromagnetic radiation in your living environment.
This table summarizes the essential tools and materials needed for effective wifi router shielding, along with their purposes and relevant features.
| Item | Purpose | Key Features |
|---|---|---|
| EMF-blocking fabric/copper mesh | Shield router from radiation | Conductive, blocks 2.4 & 5 GHz frequencies |
| EMF meter | Measure electromagnetic radiation | Reads RF levels, suitable for wifi signals |
| Precision cutting tools | Cut materials to size | Scissors or utility knife for clean edges |
| Measuring tape | Accurate sizing | Ensures correct fit around the router |
| Adhesive/velcro strips | Secure shielding in place | Gentle on surfaces, easy to adjust/remove |
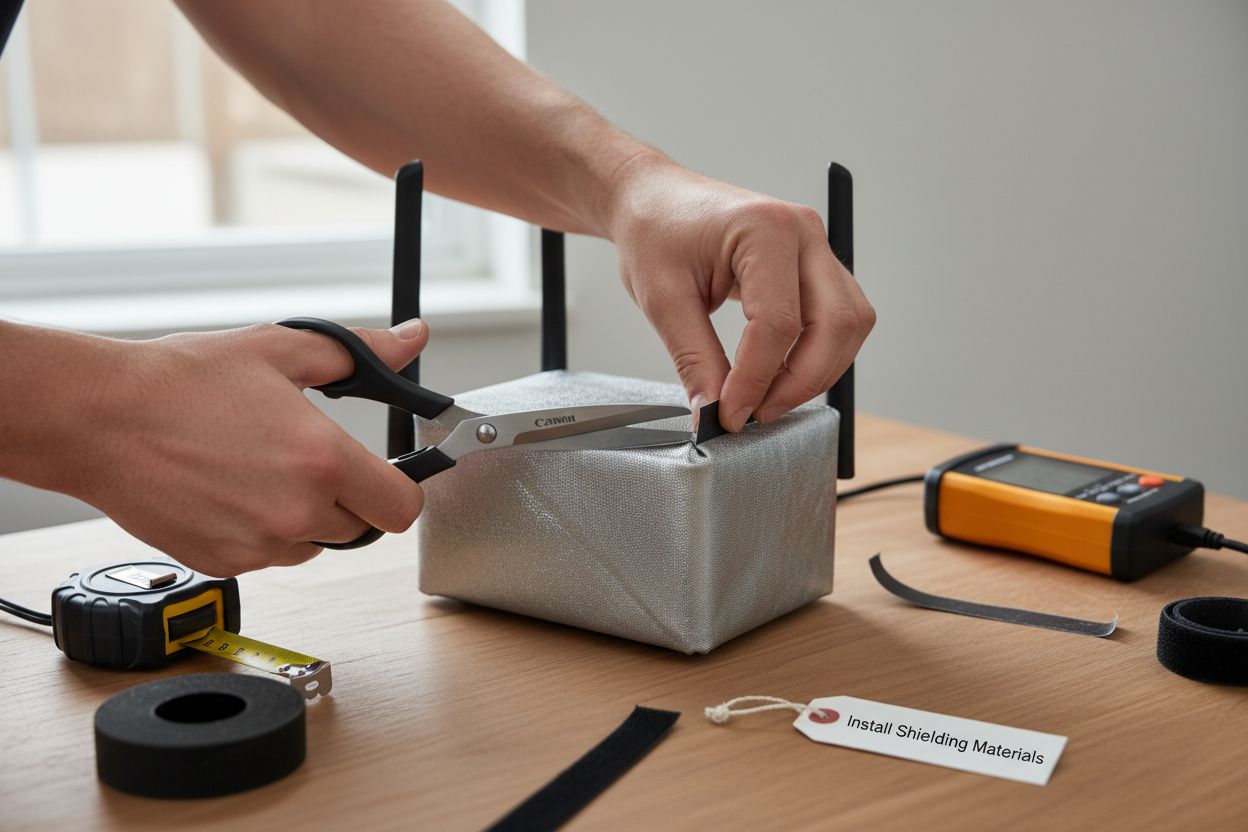
Step 3: Install Shielding Materials Around the Router
Installing shielding materials around your wifi router requires precision, patience, and a strategic approach to effectively reduce electromagnetic radiation. The goal is to create a protective barrier that minimizes radiofrequency exposure without compromising the router’s functionality.
Begin by carefully measuring your router and cutting the EMF-blocking fabric or mesh to fit precisely. Accuracy is crucial - you want complete coverage with minimal gaps that could allow radiation to escape. Avoid leaving any significant openings that might compromise the shielding effectiveness. Measure twice and cut once to ensure a perfect fit that wraps around the entire device.
As you prepare to install the shielding material, pay close attention to ventilation requirements. Scientific research emphasizes the importance of maintaining proper airflow to prevent router overheating. Create small, strategic ventilation points that allow heat to dissipate while maintaining the integrity of the electromagnetic shield. This might involve carefully cutting precise holes or using a mesh material that naturally allows some air circulation.
Securing the shielding material requires a gentle yet firm approach. Use soft adhesive strips or velcro attachments that won’t damage the router’s exterior. Position the material to cover all sides of the router, including the top and bottom surfaces. If using multiple pieces, ensure they overlap slightly to create a continuous protective barrier.
Key verification steps for successful installation include:
- Complete coverage of router with minimal gaps
- Maintained router ventilation
- Secure attachment of shielding material
- No interference with router’s operational ports
After installation, use your EMF meter to measure the radiation levels. You should observe a significant reduction in electromagnetic radiation compared to your initial measurements.
 Take readings from multiple angles to confirm the effectiveness of your shielding approach.
Remember that wifi router shielding is an ongoing process. Periodically check the condition of your shielding materials, ensuring they remain intact and continue to provide optimal protection against electromagnetic radiation. This careful approach transforms your router from a potential health risk into a more manageable technology component.
Below is an organized checklist summarizing the key verification steps for installing shielding materials around your wifi router.
| Verification Step | Description |
|---|---|
| Complete coverage | Shielding material wraps the router with minimal gaps |
| Maintained ventilation | Vent points prevent overheating while ensuring protection |
| Secure attachment | Shielding is firmly affixed without damaging the router |
| No interference | All operational ports remain accessible and unobstructed |
| Overlap of materials | Multiple pieces overlap to create a continuous barrier |
| Post-installation measurement | EMF meter shows reduced radiation after installation |
Step 4: Optimize Router Placement for Maximum Effectiveness
Router placement is a critical yet often overlooked strategy in minimizing electromagnetic radiation exposure.
Your goal is to strategically position the wifi router to reduce direct radiation while maintaining necessary network connectivity. This step requires careful consideration of both technical performance and potential health impacts.
Begin by identifying areas in your home with the least human interaction. Avoid placing the router in bedrooms, home offices, or spaces where family members spend extended periods. Instead, choose locations that provide necessary signal coverage while maximizing distance from primary living areas. Elevation can be a powerful tool in radiation management - consider placing the router on a high shelf or mounting system that keeps it away from direct human contact zones.
According to Federal Communications Commission guidelines, strategic positioning can significantly reduce localized RF energy exposure. Consider using a mounting solution that allows you to position the router centrally within your home while maintaining distance from frequently occupied spaces. Avoid placing the router near windows, as glass can sometimes reflect and concentrate electromagnetic signals.
When selecting a placement location, consider the router’s operational characteristics. Thick walls, metal objects, and electronic devices can interfere with signal distribution and potentially increase radiation concentration. Choose a location with minimal obstructions that allows for even signal dispersal while keeping the router away from areas of prolonged human presence.
Key considerations for optimal router placement include:
- Maximum distance from sleeping and working areas
- Elevated positioning
- Minimal signal obstruction
- Centralized network coverage
- Away from direct human interaction zones
Use your EMF meter to verify radiation levels at different potential placement locations. Take multiple readings to ensure you’ve found a position that minimizes electromagnetic exposure while maintaining necessary network performance. Remember that every meter of distance between the router and living spaces can significantly reduce potential radiation risks.
This strategic placement approach transforms your wifi router from a potential health concern into a more manageable technological tool, prioritizing both connectivity and personal well-being.
Step 5: Test Wifi Signal Strength and Shielding Effect
Testing your wifi router’s signal strength and shielding effectiveness is a crucial final step in your electromagnetic radiation protection strategy. Your objective is to confirm that your shielding efforts have not compromised network performance while simultaneously reducing radiation exposure.
Start by conducting comprehensive signal strength tests using multiple devices across different areas of your home. Utilize smartphones, laptops, and tablets to verify consistent connectivity and download speeds. Signal strength measurements will help you understand whether your shielding materials have created any potential network interference. Pay special attention to areas previously experiencing weak signals, as your router placement and shielding might impact overall network distribution.
Research from wireless communication experts emphasizes the importance of maintaining network performance while implementing radiation reduction techniques. Use professional wifi analyzer applications that provide detailed metrics about signal strength, channel interference, and network quality. These tools offer precise measurements that go beyond basic connectivity tests.
Your EMF meter becomes a critical tool in this verification process. Conduct thorough radiation measurements in multiple locations, comparing readings before and after implementing your shielding strategy. Look for significant reductions in electromagnetic radiation levels without dramatic signal degradation. The goal is achieving a balance between minimized radiation exposure and maintained network functionality.
Key verification steps include:
- Comprehensive wifi signal strength tests across multiple devices
- Radiation level measurements using EMF meter
- Network speed and connectivity verification
- Comparison of pre and post-shielding performance
- Assessment of signal quality in different home areas
If you notice any significant signal degradation, you may need to adjust your shielding materials or router placement. Some materials might require strategic cutting or repositioning to maintain optimal network performance. Remember that effective shielding is a nuanced process requiring patience and precise adjustments.
Consider documenting your test results, creating a baseline record of your wifi router’s performance and radiation levels. This documentation can help you track long-term effectiveness and make informed adjustments to your electromagnetic radiation protection strategy.
Step 6: Monitor Radiation Levels Over Time
Continuous monitoring of electromagnetic radiation levels represents the final and most critical phase of your wifi router shielding strategy. Your objective is to establish a long-term surveillance system that tracks radiation exposure and ensures the ongoing effectiveness of your protective measures.
Implement a systematic approach to radiation tracking by maintaining a detailed log of EMF meter readings. Take measurements at consistent intervals - ideally weekly or biweekly - using the same EMF meter and measurement points established during your initial assessment. Consistency is key in detecting subtle changes in radiation levels. Create a spreadsheet or digital record that documents date, time, location, and precise radiation measurements to build a comprehensive historical dataset.
International research institutions emphasize the importance of ongoing environmental radiation monitoring. Your tracking should not only focus on router-specific emissions but also consider cumulative radiation exposure from other electronic devices in your living space. Consider exploring our guide on top radiation-emitting devices to understand the broader electromagnetic landscape of your home.
Pay special attention to potential changes in router performance or household electronics that might impact radiation levels. Factors such as router firmware updates, new electronic device installations, or changes in home layout can significantly influence electromagnetic radiation distribution. Your monitoring approach should be adaptive and responsive to these dynamic environmental conditions.
Key monitoring strategies include:
- Weekly EMF meter readings
- Consistent measurement locations
- Detailed digital documentation
- Comparative analysis of radiation levels
- Assessment of environmental changes
Establish alert thresholds that prompt immediate investigation if radiation levels unexpectedly increase. These predetermined benchmarks will help you quickly identify and mitigate potential radiation risks. Remember that monitoring is an ongoing process requiring patience, precision, and proactive management.
By maintaining a vigilant approach to radiation tracking, you transform wifi router shielding from a one-time intervention into a comprehensive, long-term health protection strategy. Your commitment to continuous monitoring empowers you to make informed decisions about electromagnetic exposure in your living environment.
Protect Your Family from Hidden Wifi Radiation
If you are concerned about the electromagnetic radiation coming from your wifi router, you are not alone. This article showed how invisible emissions can pose real health challenges inside your home and highlighted how steps like EMF shielding and strategic placement can help. Many people feel anxious about the unseen impact on their loved ones, especially in areas where they sleep and work. But manual shielding only goes so far. To truly minimize risk, you need proven protection you can trust. Learn how our advanced solutions address not just wifi routers, but also the phones, laptops, and smart devices that quietly amplify everyday exposure.

Take the guesswork out of EMF safety. Visit Omnia Radiation Balancer to explore our scientifically tested products that deliver measurable results for blood health, heart strength, and even water structure. For more on reducing EMF from top devices, read our guide on radiation-emitting devices. Start protecting your living space today—because every day matters for your health and peace of mind.
Frequently Asked Questions
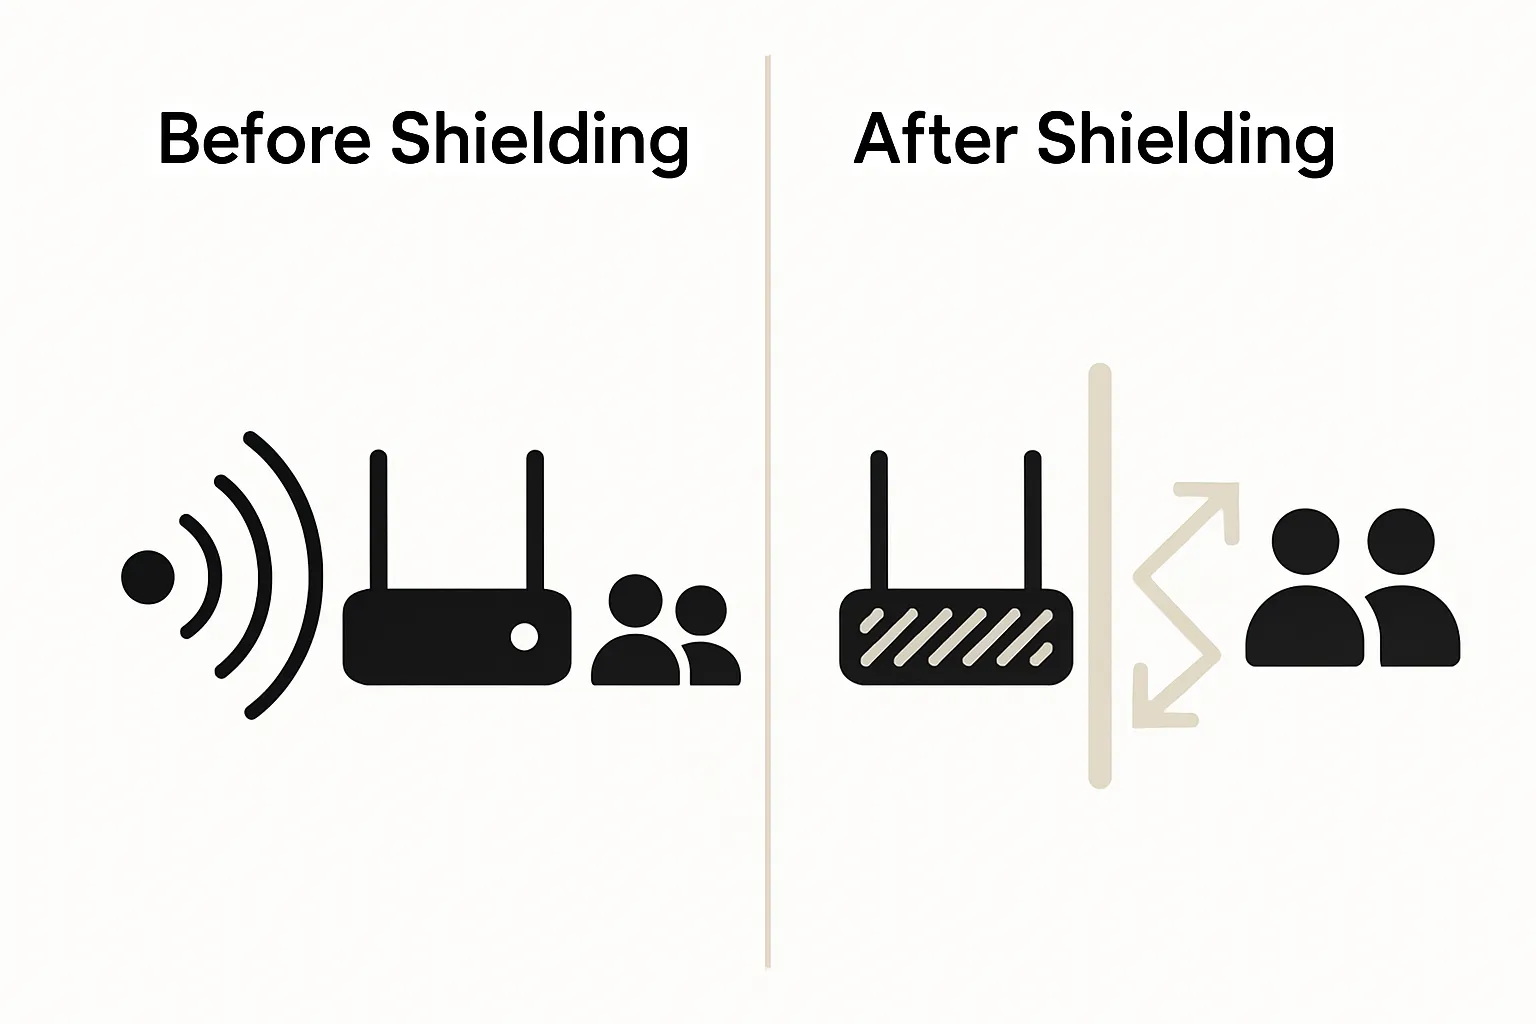
How does wifi router shielding work?
Wifi router shielding works by using specialized materials designed to block or reduce electromagnetic radiation emitted by the router. These materials can significantly lower radiation exposure while maintaining network functionality.
What materials are effective for wifi router shielding?
Effective materials for wifi router shielding include EMF-blocking fabric, copper mesh, and aluminum-infused textiles. These materials are engineered to attenuate radiofrequency radiation effectively.
How can I test the effectiveness of my wifi router shielding?
To test the effectiveness of your wifi router shielding, use an EMF meter to compare radiation levels before and after installation. Measure the radiation at various distances from the router to confirm the reduction in electromagnetic exposure.
What are the best practices for optimal router placement?
Best practices for optimal router placement include positioning the router away from frequently used areas, elevating it on a shelf, and avoiding placement near windows or obstacles that might interfere with signal distribution. Aim for maximum distance from living spaces to minimize direct radiation exposure.
Share and get 15% off!
Simply share this product on one of the following social networks and you will unlock 15% off!